Ever wanted to make more of the Solidworks models you have created, then of course you can, as you have already done most of the hard work.
The purpose of this site is to show you how you can create presentations with real impact and style, by using the your basic model data plus a couple of other pieces of creative software.
To make any start at all you will need to have Photoshop installed and for preference Photoworks the standard rendering plug-in for solid works.
These two software applications will cover most of your needs although there are several useful applications that will be discussed at a later date.
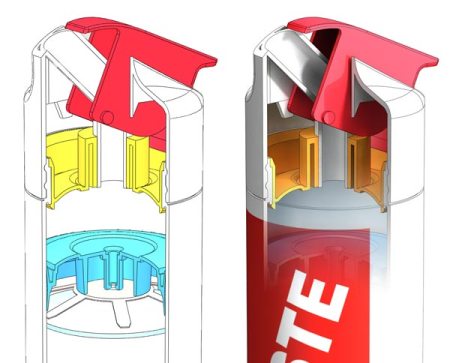
To show you the type of output that is possible I have included the image comparison shown below. On the left is an original screen dump of the model showing the cutaway section and on the right is the same model generated with Photoworks and Photoshop.
This final image is ready for inclusion into a presentation. It shows a partial cross section through the model blending out towards the bottom. It has been rendered in Photoworks and has a decal (Label) fitted to the outside of the container. The model was selectively sectioned in Solidworks leaving the red lever complete, so as to give the finished image more depth. Two renders were made, the first of the cross section and the second as an un-sectioned model and then the two combined in Photoshop.
For the moment this is the end of this first post on Solid Impression, and I hope over the next few weeks to show in detail how this image was created, and then go onto ever more interesting things related to Solidwork, Photoworks and Photoshop.

